Friday, July 27, 2012

DIY Notebook.

These notebooks are the perfect size to keep in your purse or on your desk.  They'd also make a great gift.  Isn't your sister's birthday coming up?
Items you'll need:
-12x12 scrapbook paper
-Ruler
-Thread 
-Sewing Machine
-Paper cutter
To make one notebook you will need to cut one 3x12 strip of paper for the cover of the notebook and four strips of white paper (also 3x12) for the inside pages of the notebook.  
Fold all of the strips of paper in half.  It's best if you fold them each individually instead of all at the same time.  Sew the stack of paper together along the middle crease with a sewing machine.  I set my sewing machine to a medium straight stitch.  Be sure to do some back stitching on the ends so that the thread doesn't come undone.  
And there you have it, an adorable handmade notebook!

Wednesday, July 25, 2012

Lemon Layer Cake and a Triangle Banner Topper.

This cake is pure lemony goodness and is made completely from scratch (I can't believe I used an entire carton of eggs!).  I guess that's what makes it so good, along with loads of butter, sugar, and fresh lemon zest.
(Recipe adapted from PAULA DEEN and LIFE IS GREAT).

INGREDIENTS

Cake:

  • 1 cup (2 sticks) butter, at room temperature
  • 2 cups sugar
  • 4 eggs
  • 3 cups sifted self-rising flour
  • 1 cup milk
  • 1 teaspoon pure vanilla extract
  • 2 lemons zest
Frosting:
1 1/2 cups sugar
  • 1/4 teaspoon cream of tartar or 1 tablespoon white corn syrup
  • 1/8 teaspoon salt
  • 1/3 cup water
  • 2 egg whites
  • 1 1/2 teaspoons pure vanilla extract

Filling:

  • 8 egg yolks
  • 1 1/2 cups sugar
  • 1/4 cup (1/2 stick) butter
  • 3 lemons, zest grated and juiced
DIRECTIONS
Preheat oven to 350 degrees F. Grease and flour 3 (9-inch) cake pans.  
To make the cake:  Using an electric mixer, cream butter until fluffy. Add sugar and continue to cream well for 6 to 8 minutes. Add eggs 1 at a time, beating well after each addition. Add flour and milk alternately to creamed mixture, beginning and ending with flour. Add vanilla and continue to beat until just mixed.  Zest 2 lemons and mix it into the batter.  Divide batter equally among prepared pans. Level batter in each pan by holding pan 3 or 4-inches above counter, then dropping flat onto counter. Do this several times to release air bubbles and assure you of a more level cake. Bake for 25 to 30 minutes or until golden brown. Cool in pans 5 to 10 minutes. Invert cakes onto cooling racks. Cool completely.
To make the frosting:  Place sugar, cream of tartar or corn syrup, salt, water, and egg whites in the top of a double boiler. Beat with a handheld electric mixer for 1 minute. Place pan over boiling water, being sure that boiling water does not touch the bottom of the top pan. Beat constantly on high speed with electric mixer for 7 minutes. Beat in vanilla.
To make the filling:  Place the ingredients in the double boiler over boiling water. Don't let top pan touch the water. Cook and stir until mixture begins to gel or thicken. Remove from heat and allow to cool.
To assemble, add 1 tablespoon of filling to the cake pedestal. Run hands along the side of the cake to remove excess crumbs. Place the cake layers on the pedestal, spreading filling between the layers and on top. Spread the sides and top of the cake with the remaining filling. Frost top and sides of cake with frosting.  (I took a blow torch to the frosting to harden it and keep it from sliding off the cake.  I also liked the look it created.  It reminded me of roasted marshmallows with a light brown crisp).  

To make your triangle banner you will need these items:
-Scrapbook paper
-Pencil
-String
-Glue
-Scissors
-2 Skewers
Draw triangles onto the paper with a pencil.  Cut the triangles out.  Glue two triangles together with the string in between the triangles (I made six triangle flags, but it may vary depending on the size of your triangles and the size of your cake), then tie each end of the string onto the skewers.
Once your banner is complete top it onto your cake.  This is a fun way to spruce up a birthday cake or to impress your guests with what you made for dessert.

Happy Baking!

Thursday, July 19, 2012

Changes.

I've changed my URL address so be sure to update your blog lists and readers.

I also want to say thank you to all of my readers and followers for your comments and support.  You seriously make my day!  I would also love your opinion on what type of posts you enjoy reading most.  Do you want to see more DIY tutorials?  Food photography?  Posts on fashion/hair/beauty?  Posts about our life and what we do?  Or is there another topic that you find interesting that you think I'd be good at?  I'd love to hear what you think!  

Wednesday, July 11, 2012

DIY Color Blocked Painted Pots.

This is a great summer project to add some more greenery to your home or porch.  I'm a sucker for succulents but you can use any plant you'd like.  
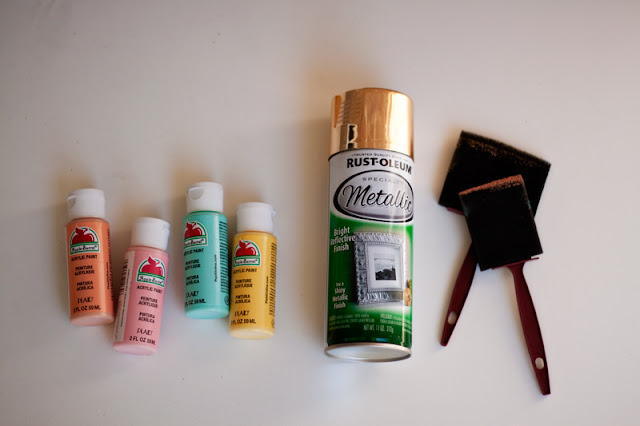
First, you'll need a terra cotta pot.  You'll also need some acrylic paint and/or spray paint, and some paint brushes.  Make sure you grab some newspaper and go outside if you decide to use spray paint.  I just free handed the color blocks but you can use masking tape if you want straighter lines.  There are so many ways you can paint your pot (stripes, polka dots, chevron, etc.).    
After your pot is painted, wait until it is completely dry.  Add soil to your pot, plant your succulent (or whatever plant you choose), add some water, then put it in a place where it will get enough sunlight.  It's amazing what a little greenery can do to a room.  Now go have fun painting your own terra cotta pot!  I'd love to see what creative things you come up with.  

Monday, July 9, 2012

Elephants, Tigers, & Bears.

Have you ever been to the circus?  Can you believe that I just went for my first time!  I felt like a little kid again watching the cool balancing acts, magic shows, and the animals do cool tricks.  I was in awe the whole time.  I bet life in the circus would be so exciting.  You could ride elephants and eat cotton candy all day.  I think I'm slightly tempted.

Thursday, July 5, 2012

Happy 1st and 4th!

One of the perks about marrying into a Canadian family is being able to celebrate Canadian Independence Day on the first of July along with celebrating American Independence Day on the fourth of July just a few days later.  That means double the parties, food, and fireworks.  While we were in Canada we watched the Raymond parade in the morning then spent the rest of the day eating pulled pork sandwiches and fruit salad at our family gathering.  We loved hanging out with all the aunts, uncles, and cousins.  And of course, we had to stop by the local Town Pump to stock up on our favorite Canadian treats (Snow Bobs, Coffee Crisps, Mr. Big, Old Dutch Chips, and gummy soda bottles!).  I'm sure we looked totally ridiculous checking out at the register with our arms completely full of junk food.  On July fourth we spent the day at Glacier National Park and enjoyed the beautiful scenery while the boys went mountain biking.   My favorite part of the day was eating dinner at SERRANOS, the best Mexican restaurant in town!

Tuesday, July 3, 2012

German Pancakes with Strawberries and Maple Syrup.

(Recipe adapted from YESTERDAY ON TUESDAY).

Get excited because I'm going to share with you our family's recipe for homemade maple syrup.  Once you try it you'll never be able to eat store bought maple syrup again.  This recipe was created by my brother-in-law, Brandon, while he was on his MISSION in France.  It's crazy good.

Brandon's Maple Syrup

Ingredients:
2 cups sugar
1/2 cup brown sugar
1 cup water 
1 teaspoon vanilla
1 teaspoon cinnamon
2 teaspoons maple flavoring
1 tablespoon butter

Directions:
Combine all ingredients in a medium saucepan.  Stir on low to medium heat until butter is completely melted and all ingredients are dissolved.  Serve warm!  Enjoy!